
![]()
![]()
You might have noticed that I like to frame my pictures. To me, it simply adds to the picture.
Currently I’m using five programs to modify my pictures:
-
Lightroom 4.2 — About the only thing I use this program for anymore is to take my RAW picture files and convert them into JPGs that are 1000 pixels on the longest side. “On the longest side” is the key phrase here because in every other program in which I’ve worked you cannot set the preference for the longest side. You can only choose horizontal side or vertical side. So if you have a mixture of landscape pictures and portrait pictures, you either have to make two passes through your files, or you have to accept that, choosing 1000 pixels for the horizontal side means that the longest side on the portrait pictures, the vertical side, will be much bigger than 1000 pixels. Ultimately all of the pictures I use in my blog posts are 600 pixels on the longest side. That pretty much means that if someone wants to borrow my pictures covertly, about the only thing they can do with them is use them on the computer. They won’t be worthy of printing because the resolution will be too low.
-
CorelDRAW! X5 — I have been using CorelDRAW! since its inception. I can do virtually anything with this program, making it my go-to program if I need to do something quickly. CorelDRAW! X5 is where I do the postage stamps at the end of each post that feature Zoey the Cool Cat approving the post.
-
Corel Photo-Paint X5 — This program comes with CorelDRAW! as its complementary photo-editing program. I have been using it for as many years as CorelDRAW! and pretty much know it inside and out. This is the program that I am most familiar with, so I don’t use it at all right now. I am forcing myself to use a different program because I am trying to become an expert at the other program.
-
Corel PaintShop Pro X5 — This program is Corel’s answer to Adobe’s PhotoShop, and I have found that it is equally powerful and equally as difficult to use. Thus I don’t use it at all because PhotoShop is that other program that I am endeavouring to become an expert at.
-
Adobe Photoshop CS6 — I bought the first version of Photoshop at the same time I bought the first version of CorelDRAW! That was a couple of decades ago I believe. At the time I needed both programs. However, when I moved to San Diego in April 1993, I had no further need for photo editing programs and quit upgrading them. When I went to upgrade my various programs in 2008, there was a significant difference between my Photoshop 8 and the new Photoshop CS3. I felt like I was in kindergarten again. Photoshop CS6 is where all my photo editing time is dedicated right now.
One of the tasks that I have been trying to learn in Photoshop is matting and framing a picture. Specifically I wanted to do it like they do it in photo galleries. Yesterday and this morning I spent a lot of time on the task and believe I have it down to a science now.
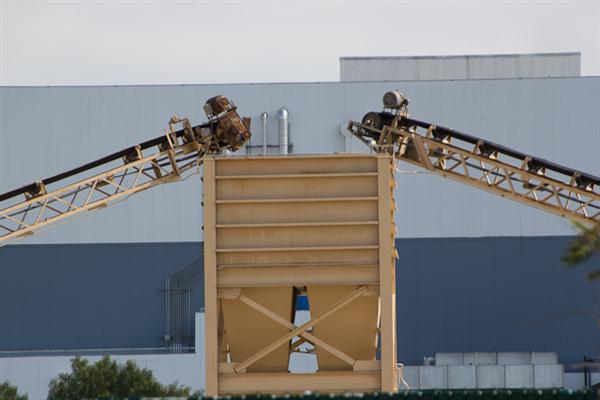
Here is the picture, unframed, that I will use:
![]()
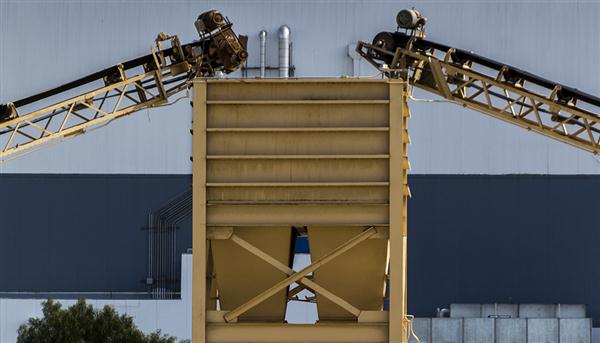
I think you’ll agree that it needs some work. First I straightened the picture. Then I cloned out the little branches at the center riight and cloned a couple of other imperfections. After that, I cropped out the gray sky and that little piece sticking up off the roof at the upper right, and then gave it some extra contrast and sharpness. That gave me the following, a much better picture:
![]()
Of course, it still needs to be framed. Here it is with the frame that I’ve been using for the past several months:
![]()
That frame was created using an Action that I found somewhere on the Internet. Unfortunately, I don’t know how to edit Actions yet so that has been the essence of my ability to frame pictures in Photoshop CS6.
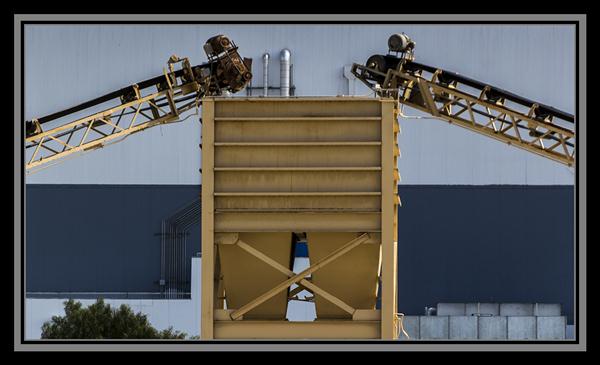
Yesterday I started working on learning how to do frames that are substantially more interesting. The culmination of my work gave me this:

![]()
Just like you would find at so many modern art galleries. I’m so happy! Magarita time!
I’m going to work on this some more with my ultimate goal being the creation of a tutorial for my readers so that you, too, can create interesting frames for your photographs!
![]()

Looking for real estate services in San Diego County?
I can highly recommend
James Frimmer, Realtor
Century 21 Award, DRE #01458572
If you’re looking for a home inspector,
I recommend Russel Ray — that’s me!![]()
![]()

Nice! Love the bottom frame – will be interested in the tutorial on that one!
LikeLike
Frames make your pic. more beautiful. Now I have to learn that for some of my photographs.
LikeLike
Russell, that frame looks so professional. It’s amazing the difference it makes when you frame the photo! You have taught me something today!
LikeLike
I so agree about framing. Nice work.
LikeLike
Hi Russell
You are so right. The framing makes such a difference. My husband paints, quite well actually, but it is the frame that makes all the difference to a painting so why not with a photograph, it’s just I hadn’t thought of it in the same way.
I would definitely be interested in reading your tutorial but can you make it “Photo framing for Dummies?” I bet there would be a market out there for that!!
Enjoy your margarita. I’m going to have a nice glass of dry white wine!
Cheers!!
Corinne
LikeLike
Looks great!!
LikeLike
Wow, it’s all in the frame. Very nice 🙂
LikeLike
That was really interesting. I like who you showed the progress step by step. I would love to learn how to do that. Someday I will.
LikeLike
Brilliant and thanks for the tutorial – too many Margaritas though and you will think you have to straighten the photo again…;)
LikeLike
Magarita time! Looks like you deserve it 🙂
LikeLike
So the framing is an action, eh? Need to go hunt for one!
LikeLike
In my recent playing around, I discovered that lots of framing actions come preloaded into Photoshop. Click on Windows, Actions and look at them all.
LikeLike
Alas…I have but PSE9 so not sure that is in there but will go poking about.
LikeLike
Laugh out loud photo of Zoey! Thanks for making my day!
LikeLike