![]()
![]()
I think one of the most common tasks that people use photo editing software for is to replace skies. I think that because there seem to be more tutorials for that task than any other. Unfortunately, too many people doing tutorials have no clue about how to do a tutorial, in my considered humble opinion. I think they learned something new and decided to do a tutorial, even though they have never done a tutorial before in their lives.
I have been exploring replacing skies for almost twenty months now, and I have finally developed a workflow that is easy and precise. However, I’m going to keep it to myself because I don’t want anyone else to know….
Just kidding.
One of the reasons why sky replacements either (1) look bad, (2) look fake, (3) don’t look good, (4) look sloppy, or (5) look really atrocious is because people don’t understand perspective relationships. The picture of the sky needs to match the perspective of the photograph.
One guy’s tutorial told us to go out and take a few hundred pictures of skies so that we would always have one to match any perspective. That’s not necessary if you understand how to use the transform controls in Photoshop, which I will show you. So here we’re going to not only replace the sky but make the sky match the perspective of the photograph.
I’m using Photoshop CC, but the basic theory here will work in any program that uses layers and masks.
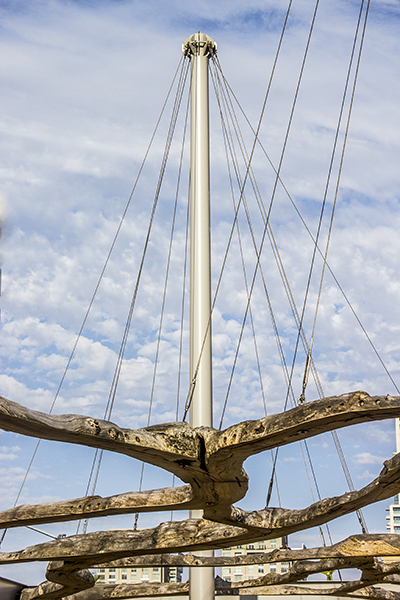
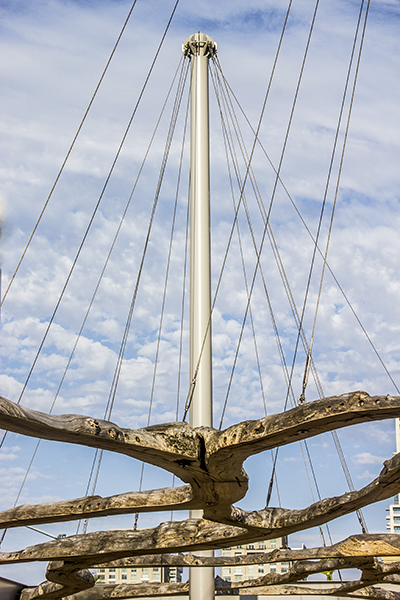
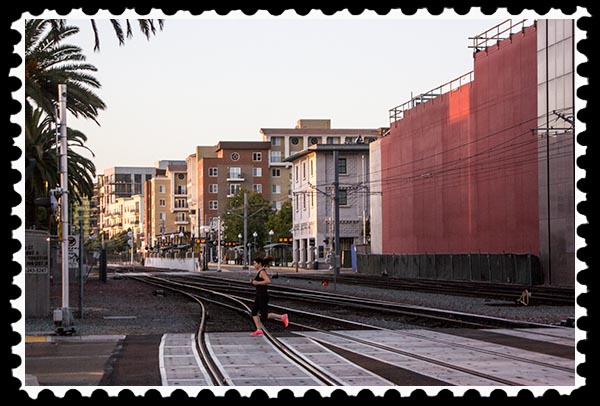
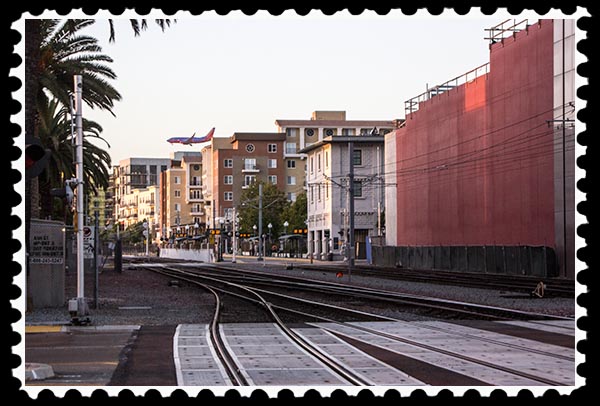
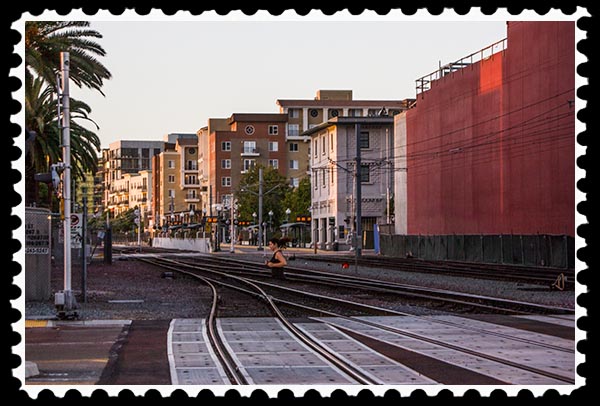
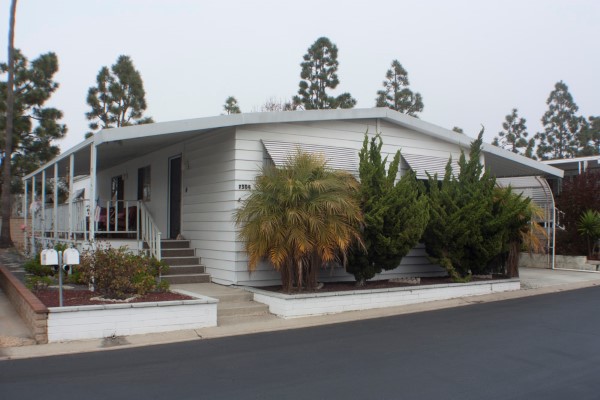
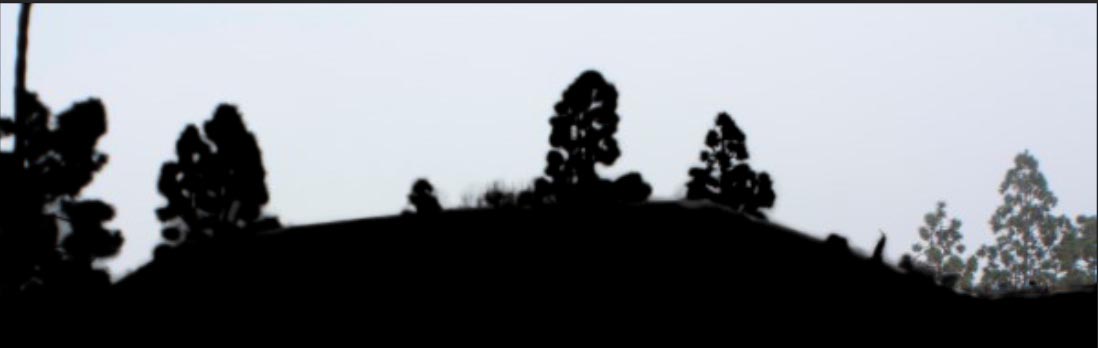
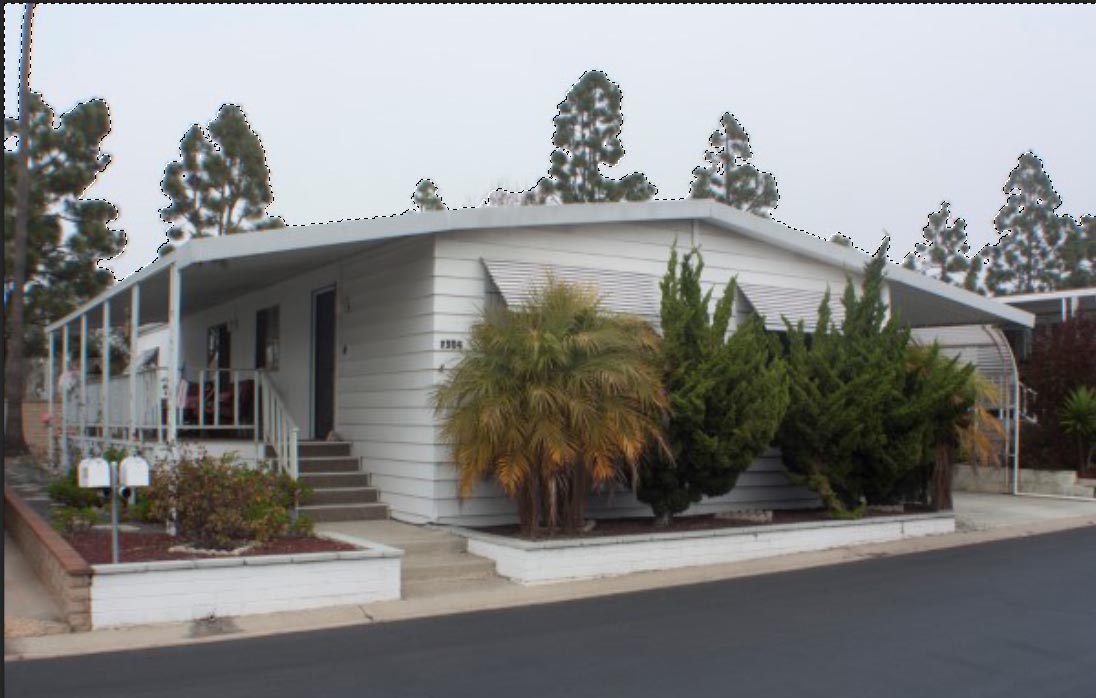
Here are the two pictures were are going to use:
![]()

![]()
Right click on each picture, select Save picture as, and save it to your computer. Make sure you know where you’re saving it because we’re going to need to find it and open it in Photoshop.
Now open Photoshop and open both pictures.
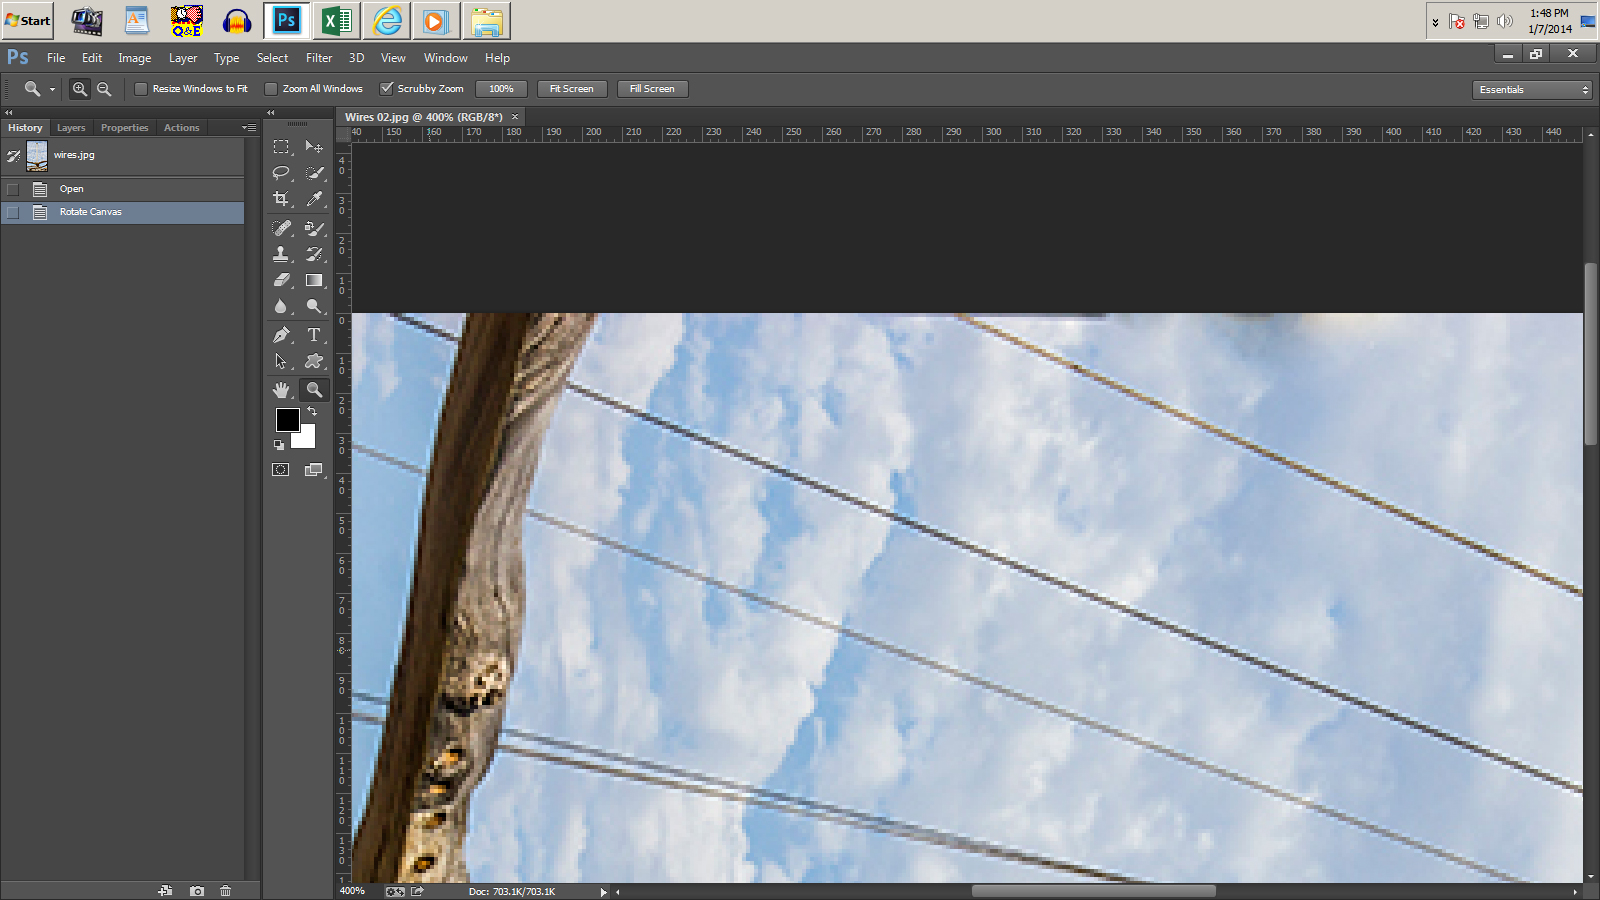
Once you have both pictures open, look at your rulers (if your rulers aren’t showing, click on View ► Rulers) and you’ll notice that our house picture is 600 pixels wide while our clouds picture is 1200 pixels wide, a 2:1 ratio. That’s the ratio I usually use because it allows me to choose the part of the sky that looks best in the picture; you’ll understand as we go along.
First we need to select the sky. Trees and little protuberances on buildings can make it difficult to select all the sky with some methods, but I’m going to show you a great method that makes it very easy to make sure those trees and protuberances make it into the picture since they make the picture itself look more realistic.
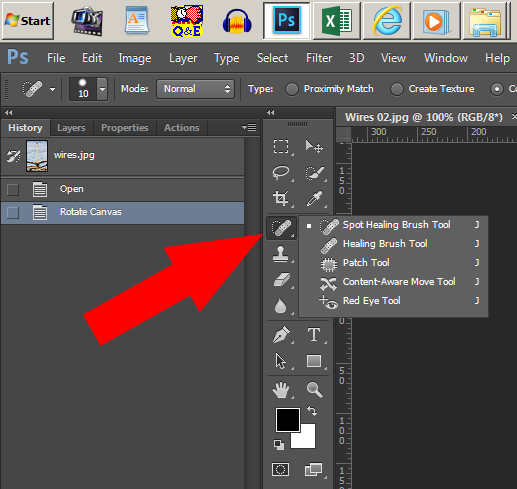
With your house picture in the window, click on the Quick Selection Tool:


![]()
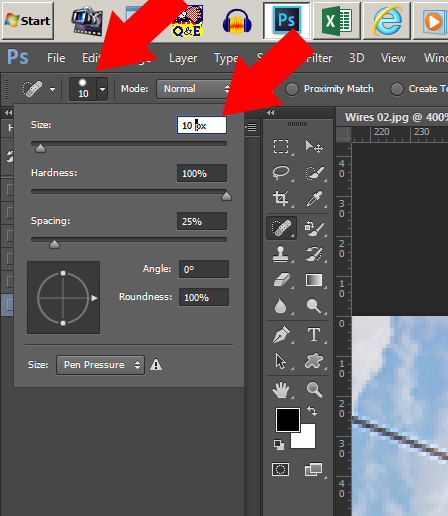
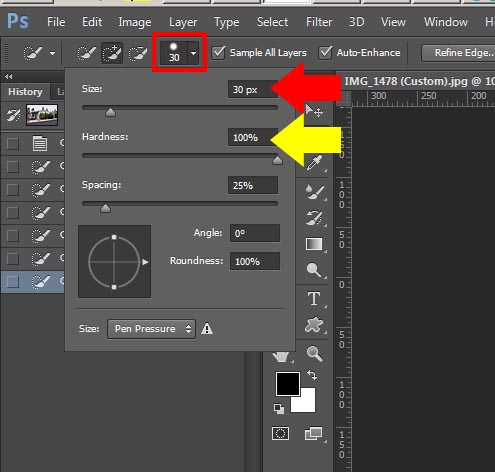
With the Quick Selection Tool selected, look at your option bar and click on the Brush Picker, inside the red square in the graphic below. A pop-up window will then show you the options for the Brush Picker, and we want a size of about 30 px (red arrow) for this exercise, and a hardness (yellow arrow) of 100%. The other defaults can stay as they are.
![]()
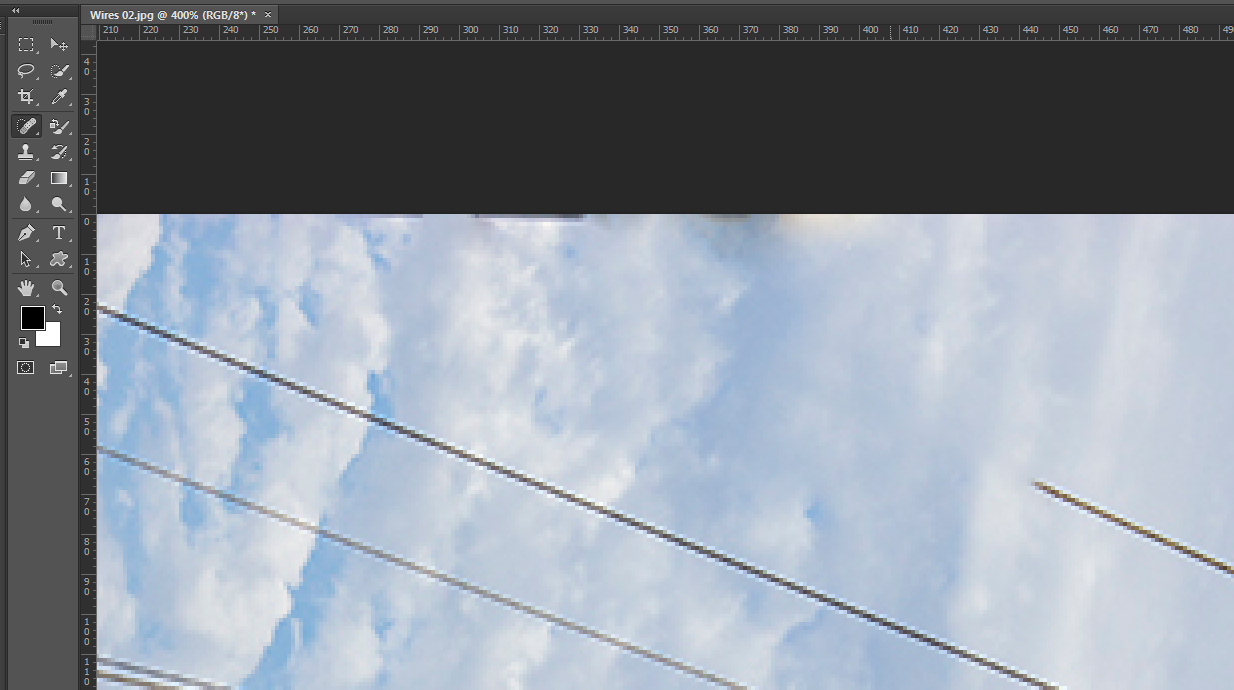
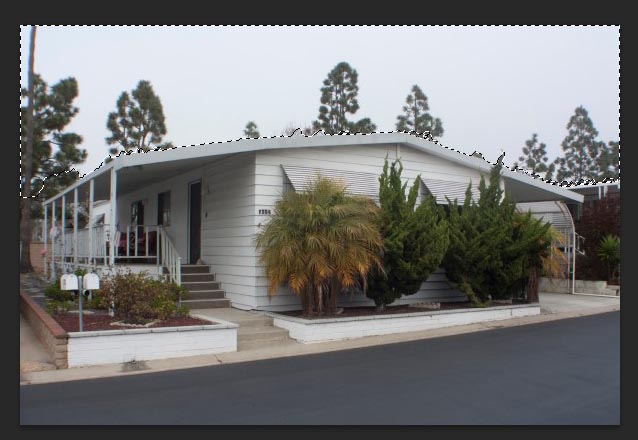
Now select your sky. You don’t have to be real exact at this point because we’ll take care of that in a future step. Right now, though, make sure you select all of the sky. If there is some sky showing through the tree, go ahead and selected the tree, too. As you select, you’ll see the infamous marching ants highlighting the borders of your selection.
Here is my house picture after selecting the sky.
![]()
Now make sure that your Foreground and Background colors are set at their defaults. Just type d and the colors will change to their defaults:

![]()
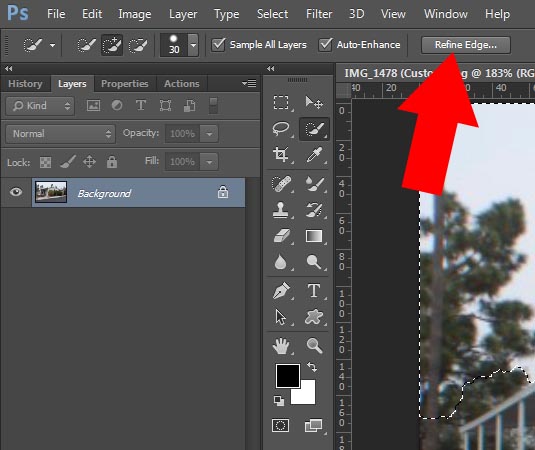
Making sure that your Quick Selection Tool is still selected, look at your options bar again and click on Refine Edge:
![]()
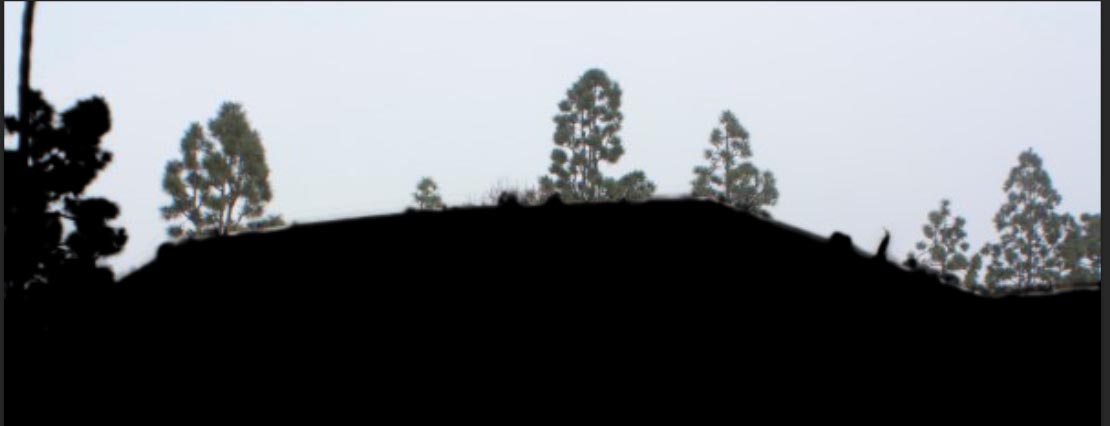
That will bring up a new window with lots of options, and the part of your picture that IS NOT selected will turn black.
![]()
Black in Photoshop means that it is hidden from whatever we doing. If it’s showing, that means that whatever we do will affect that section of the picture. So if we were to replace the sky now, we would also replace the pine trees since they are showing, i.e., they are not covered by black. We want those trees to be in black so that they do not get replaced when we replace the sky.
There are many functions in the Refine Edge window to help you with your task, so it really doesn’t matter how complicated the picture might be. You just have to find the right combination that works, and that is where the History panel can come in extremely handy. I’ll do a tutorial in the future on the power of the History panel.
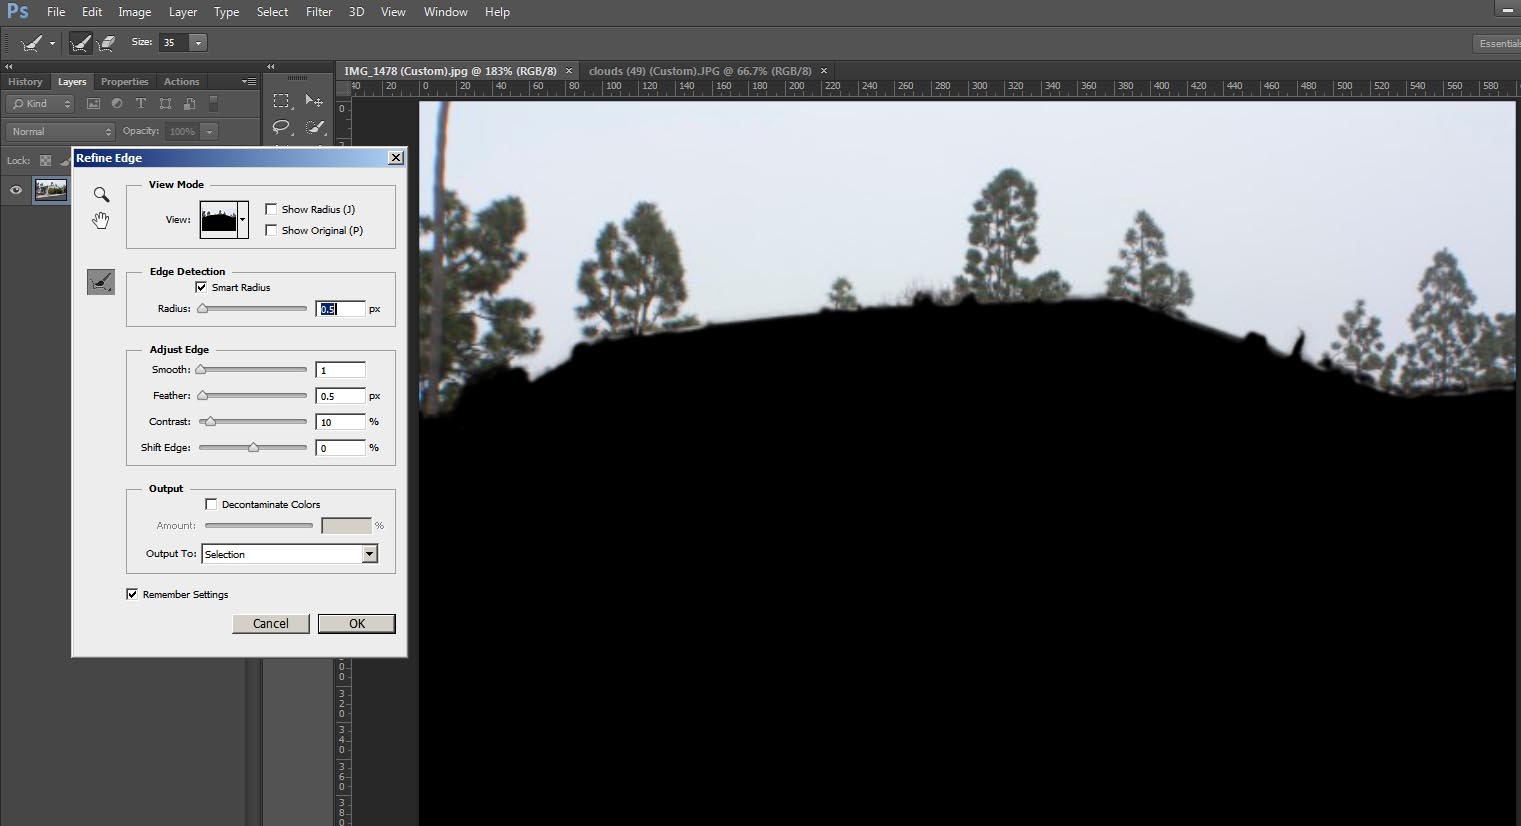
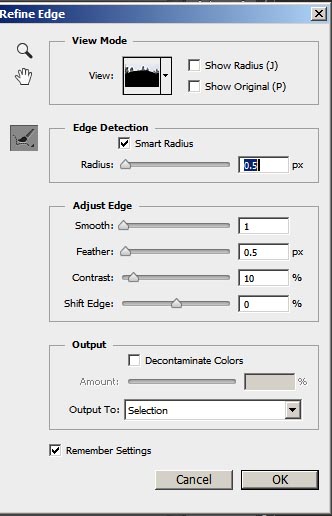
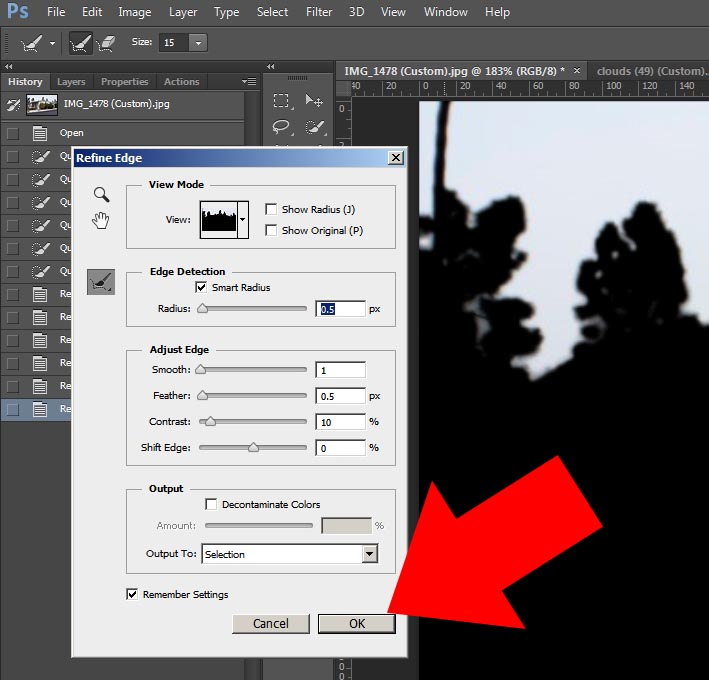
First make sure that your settings are like mine, and below the graphic I’ll explain what these settings are doing.
![]()
Starting at the top with View, I almost always use On Black so that I don’t get distracted from my task. I like to black out whatever I’m not working on.
Next, under Edge Detection, make sure the box is checked next to Smart Radius and, for these pine trees with their skinny pine needles, set the Radius to 0.5 px.
Adjust Edge is where you can really help Photoshop work with really complicated pictures, like a blonde-haired girl with her head on her blonde dog. Photoshop can easily separate blonde from blonde by using those controls.
We’re lucky with our picture because there’s good contrast between the green pine trees and the gray clouds, so change your settings to match mine. Smooth and Feather help Photoshop create a smooth contrast between the trees and the clouds, and we’ll want that same smooth contrast in our new picture.
Finding the right settings for Smooth and Feather could take you a couple of weeks—another area where the History panel can come in so handy—so I’m going to show you an ever better way to accomplish this task quickly and easily if you don’t need absolute exactness and preciseness, which we don’t when we’re posting a picture 600 pixels wide to the Internet.
Just to the left of Edge Detection, you see a brush. Click and hold on that brush until a flyout window appears, and then choose Refine Radius Tool so that there is a little black box to the left, indicating that it is selected.

![]()
Set the brush size of your Refine Radius Tool brush to about 15 px:

![]()
Now simply click and drag your mouse cursor over your trees; it’s called painting. Try to stay as much on the trees as possible so that Photoshop doesn’t think you’re wanting to paint out the clouds. Release the mouse button after each tree and you’ll see that Photoshop magically converts the green trees to black:
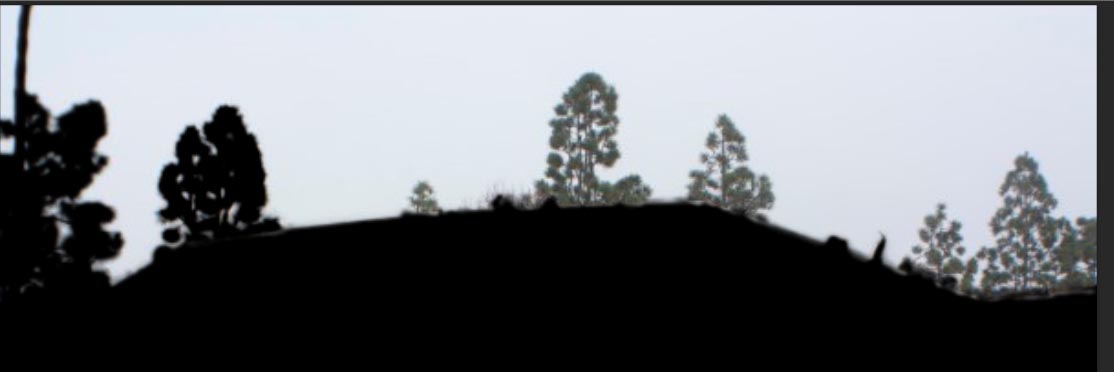
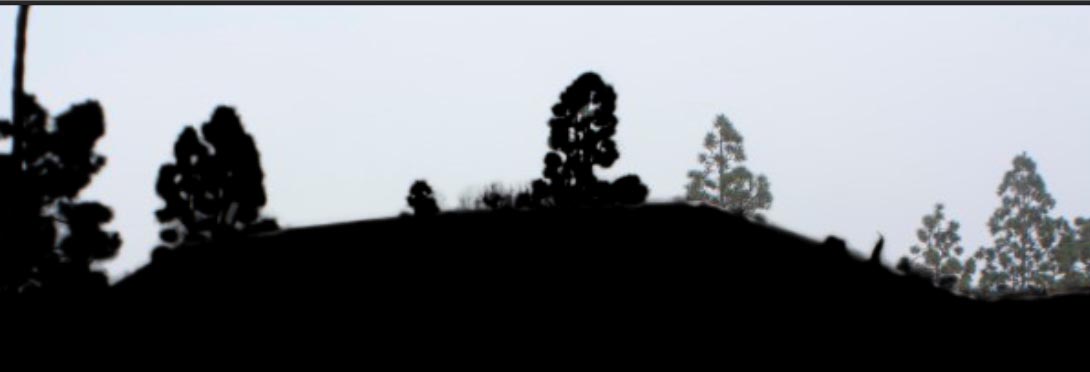

![]()
Once you’re done painting the trees, simply click OK in the Refine Edge window:
![]()
You should be back at your original picture with marching ants that look something like this:
![]()
Now let’s go get the new sky and insert it into our picture.
Click on the tab that holds your cloud picture and select the whole picture: Click on Select ► All or use the keyboard shortcut, Ctrl A. That should put a marching ants border around the cloud picture:
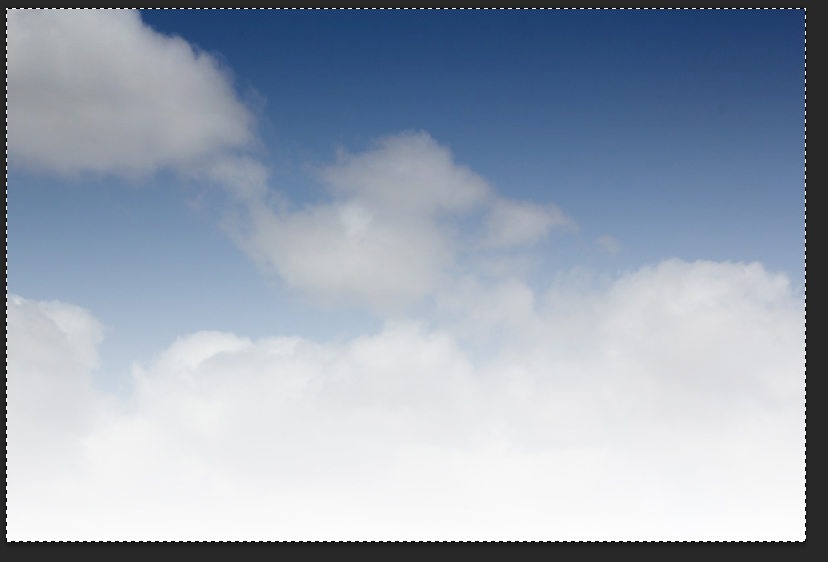
![]()
Copy the picture with either the keyboard shortcut Ctrl C or the menus, Edit ► Copy.
Go to the tab that holds your house picture. Now we are going to insert the copied clouds (they are in memory) to your picture, specifically the area that is bordered by the marching ants. This is a special type of insert, though. Click on Edit ► Paste Special ► Paste Into. This tells Photoshop to paste whatever is in memory (our clouds) into the area bordered by the marching ants. Notice that the keyboard shortcut is Ctrl Shift Alt V. (I love how keyboard shortcuts can be long now, and they still are faster than clicking on menus.)
Here is what I got when I inserted the clouds:
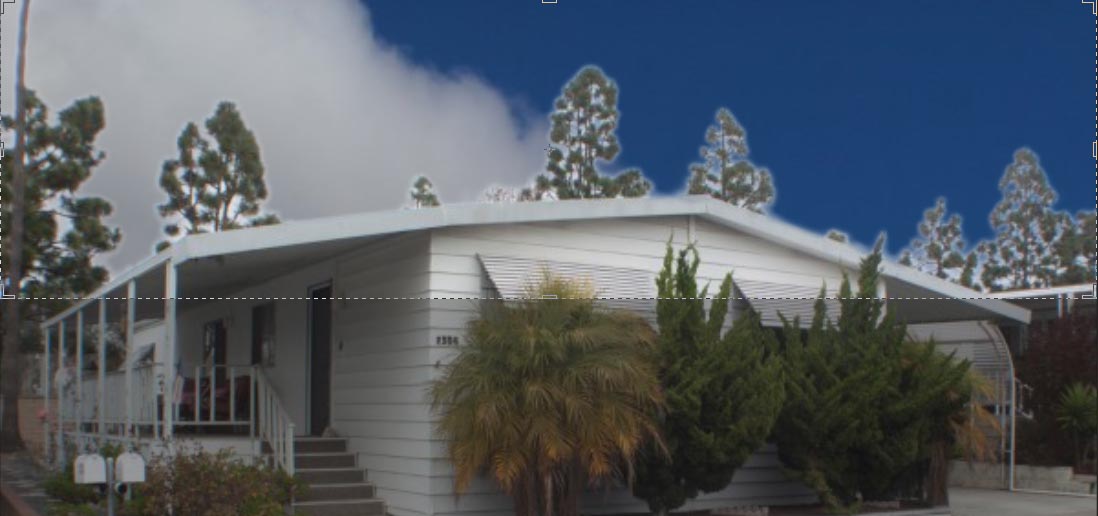
![]()
Are you as unhappy with that as I am? Not to worry. We’re not finished, but we don’t have far to go. This is where understanding perspective comes in handy.
First of all, that cloud is way too big for the picture. It’s obvious that the sky has been replaced.
Second, if you look at daylight landscape pictures, you’ll notice that the horizon is always lighter than what is directly above you. That is caused by perspective. Things that are closer to you tend to be brighter with more contrast.
We need to resolve both of those problems here, and it’s very easy to do. It’s even easier if you make sure that your cloud picture is bigger than the picture with the sky to be replaced, and having clouds in the picture makes it even easier to create something that looks realistic.
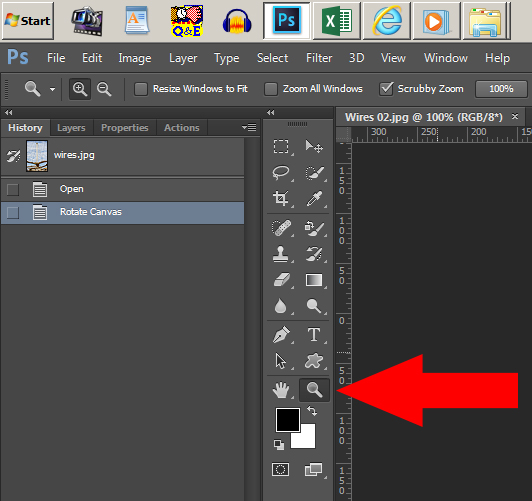
So, after inserting the clouds, we want to move them around. Click on your Move Tool (red arrow) and then click on Show Transform Controls (yellow arrow).
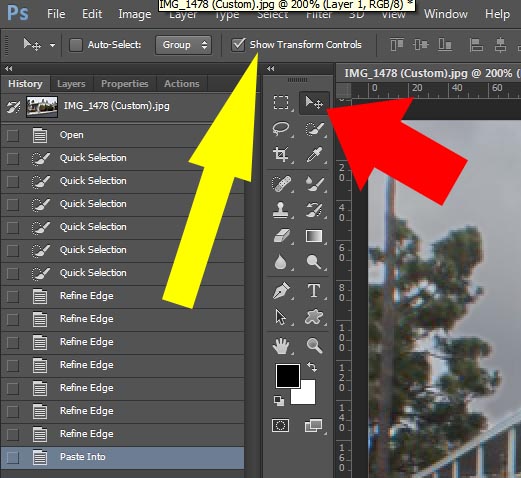
![]()
You probably won’t be able to see the transform controls because the cloud picture is twice as large as the house picture. Hold the Control key down and hit the 0 (zero) key on the keypad. Don’t try to use the numeric keys at the top of your keyboard. If your keyboard doesn’t have a keypad at the right, the keypad is probably in the center of your keyboard and shows as blue figures, meaning you have to access them with a function or option key. Or you can use the menus: click on View ► Fit on screen.
That should give you something looking like this:

![]()
Just for fun, click on Show Transform Controls again and you’ll see that square disappear. We need it, though, so make sure it’s showing.
Now simply click, hold, and drag those square boundary markers to resize your cloud picture. You can position the clouds anywhere you think looks nice. Here’s my final picture:
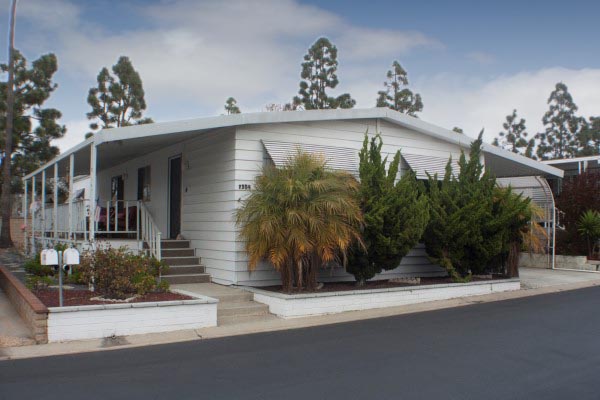
![]()
If you look closely at that middle pine tree, the tallest one, you can see some glowing in the branches. There are two ways to get rid of the glow. The first is by learning how to use all of those controls in that Refine Edge window, specifically the Smart Radius, Smooth, and Feather controls. You can spend hours working on just one picture.
An easier way I’ve found is to always use a picture that has a good supply of clouds throughout the picture so that you can move those clouds around and put them behind any problem areas. It’s faster by at least a few dozen hours!
There is one other way to resolve that problem but I haven’t found a good work flow for it, yet. When I do, I’ll let y’all know.
![]()

Need a unique gift?
Consider Photographic Art!![]() Visit Russel Ray Photos.
Visit Russel Ray Photos.
►►►►◄◄◄◄
Looking for real estate services in San Diego County?
I can highly recommend James Frimmer, Realtor, CDPE
CA BRE #01458572

►►►►◄◄◄◄
If you’re looking for a home inspector,
I recommend Russel Ray — that’s me!![]()
![]()